What is tree transplanting, and how do you do it successfully? Tree transplanting is when you move an established tree from one location to another. You can transplant trees to a new location on the same property, or move them to entirely new properties.
In this blog, learn the when and why behind tree transplanting, as well as how to do it successfully without damaging the tree.
Transplanting a tree is a completely different process from planting a new tree, and there are special considerations to keep in mind in Texas, such as heat, periodic droughts and soil conditions. It’s crucial to follow the right steps and bring in professional help.
This blog also includes expert insights from J Zambo, Lawn and Tree Division Manager at ABC Home & Commercial Services. With over 20 years of experience, he is an ISA Certified Arborist and ISA Qualified Tree Risk Assessor.
Common Reasons Homeowners Choose Tree Transplanting
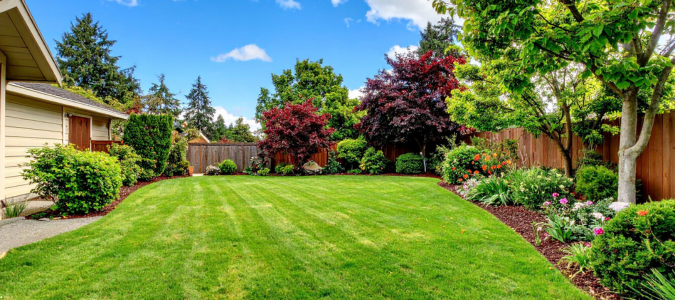
There are multiple reasons why homeowners may choose to transplant a tree. The most common reason is landscaping redesign. If you’re making major changes to the exterior of your home, such as adding a driveway, patio, pool or other changes, you may need to move trees around.
Additionally, homeowners choose tree transplanting to preserve mature or sentimental trees. Mature trees carry a history with them, and they may have personal or environmental value. For example, some trees are planted to mark a milestone. Transplanting them can preserve their life while still meeting your landscaping needs.
However, in some cases, removing a mature tree is a better option than transplanting it. When a tree is stressed, diseased or unstable, it may not survive a transplant. Speak to a professional landscaper about whether it’s best to transplant or remove your mature trees.
When Is the Best Time for Transplanting Trees in Texas?
The best time to transplant a tree in Texas is from late fall to early spring. Trees go dormant during this time, which means they don’t actively put energy into new growth. Instead, their energy can go to strengthening and reestablishing their root systems, making it an ideal time for a transplant.
It’s crucial that you don’t transplant trees during the summer, especially in Texas. Our high heat makes the trees’ root systems more sensitive and dramatically increases water needs. Relocating a tree in the summer can cause transplant shock, which can cause severe damage to the health of your tree.
It’s important to note that younger trees are easier to transplant than mature trees, as they have smaller root systems and are more adaptive to new environments. Successfully transplanting mature trees requires planning and plenty of recovery time. This is another reason why planting in the correct season is important. It’s also helpful to understand the life span of trees, such as how long oak trees live.
Another factor is whether the trees have shallow or deep roots. Shallow-root tree species are easier to transplant than species with deep roots because they’re easier to move and are more likely to adapt to their new environment faster.
If you aren’t sure if your tree can handle transplanting, contact a lawn care professional.
How Tree Transplanting Works
There are seven steps to successfully transplanting a tree, starting with the planning stage all the way to the reestablishment stage. These include:
- Evaluate the tree and the site
- Prepare the root ball
- Identify and set the basal flare
- Check drainage before planting
- Dig the hole to the right size
- Backfill with the right soil mix
- Water and support establishment
Let’s dive into each of these.
Step 1: Evaluate the Tree and the Site
Before you remove a tree from its current environment, make sure you’re moving it to the right place. That starts with thinking long term.
J Zambo explains:
“The first thing to consider is, will it grow in this environment? Is it the right tree for the right space? Is this the right climate for this tree? Second is to make sure that this is the right tree for this space. Although it’s the right climate and the right environment, what is this tree going to look like when it’s mature? Right now, it’s this big, but in 10 years, it could be this big and this may not be the space that can hold that.”
In other words, relocation isn’t just about whether the tree can survive. It’s about whether it can thrive for decades to come.
Consider these factors:
- Make sure that the tree is a good fit for the climate and soil
- Consider how large the tree will be at maturity, not just how big it is now
- Confirm that the space can support healthy long-term growth. There must be enough space for the root, canopy growth and long-term structural stability
- Identify all potential conflicts, such as buildings, rocks or other trees
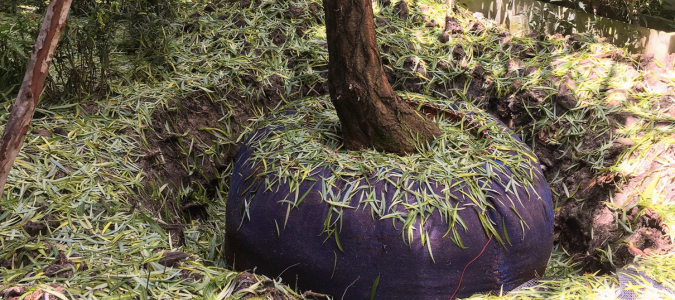
Step 2: Prepare the Root Ball
Once you’ve chosen the right location, the next step is preparing the root ball so the tree can establish itself successfully. This plays a major role in long-term health.
As J Zambo explains:
“You’ll want to take a knife and score all the roots and break up the root ball so those roots are nice and loose.”
The goal is to prevent roots from continuing to grow in tight circles and instead encourage them to expand outward into the surrounding soil.
Carefully remove the tree from its container or former location, and begin loosening the root ball.
Follow these steps:
- Inspect the root system for circling or compacted roots
- Loosen or prune circling roots to prevent them from continuing to grow inward
- Lightly score the outer edge of the root ball to loosen the roots and encourage them to spread in the new location
Step 3: Identify and Set the Basal Flare
Every tree has what’s called a basal flare, the area at the base of the trunk where it widens and transitions into roots. Identifying this flare before transplanting is important. Planting too deeply is one of the most common mistakes homeowners make.
J Zambo explains:
“You may have to remove some excess soil off the top of the root ball, but when you take that soil off, you want to expose that flare and plant that flare so that it’s right at the soil surface or maybe a little higher. That needs to be exposed.”
Follow these steps:
- Remove excess soil at the top of the root ball to expose the basal flare
- To locate the basal flare, look for the area where the trunk naturally turns into roots
- Set the tree so that the basal flare sits at or slightly above ground level
Step 4: Check Drainage Before Planting
Before relocating a tree, ensure its new home has proper drainage. Otherwise, poorly draining soil can cause root rot and other issues that threaten your tree’s health and sustainability.
Follow these steps:
- Before planting, test the planting hole to make sure water drains efficiently
- Avoid planting in locations where water pools or sits too long, especially after a rainfall
- If drainage is poor, make improvements before planting, such as grading or soil adjustments
Step 5: Dig the Hole to the Right Size
The planting hole should be about one and a half times wider than the root ball. This gives the roots plenty of room to extend and establish themselves.
However, the planting hole should not be too deep. A shallow, wide hole leaves plenty of space for the roots to extend while preventing the tree from being planted too deeply into the soil.
Step 6: Backfill With the Right Soil Mix
Backfilling isn’t just about filling the hole back in. The type of soil you use directly affects how well the tree establishes and how stable it becomes over time.
As J Zambo explains:
“If you just put all good soil amendment in the planting hole, the roots and the tree are like, ‘Man, this is some really nice soil,’ and then it touches native soil. It’s like, ‘Ah, I don’t really like that stuff, I just want to stay here,’ and now the tree becomes unstable.”
He adds that mixing native soil into the backfill encourages roots to grow beyond the planting hole instead of circling inside it.
“By mixing the native soil in, what you’re doing is you’re introducing that native soil, and the tree says, ‘Oh, okay, I get it, I’m supposed to go into that other stuff too.’ That way, we’re encouraging roots to get outside of that planting hole and into the native soil to give it really good stability.”
Follow these steps to backfill the planting hole with the right soil mix:
- Backfill primarily with the native soil that was removed from the planting hole
- Blend in soil amendments as needed to improve soil drainage or structure
- Avoid filling the hole with only enriched soil
Step 7: Water and Support Establishment
Once the tree is planted, you must support root establishment with proper watering.
Follow these steps:
- Immediately after planting, water the tree thoroughly to remove all air pockets
- Keep a close eye on moisture levels during the establishment period
- Continue watering on a schedule that meets your trees’ needs. Proper watering is crucial for helping the roots settle
To determine the proper watering schedule for your species of tree, consult with a landscaping professional.
Risks and Challenges of Transplanting Trees
There are several risks and challenges associated with transplanting trees. This is why it’s important to ensure the right conditions and enlist professional help.
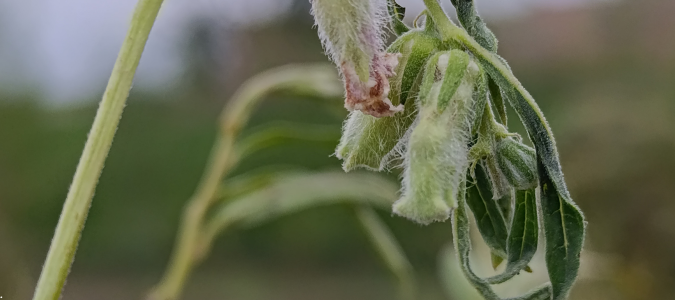
First, trees may experience symptoms of transplant shock, which include leaf wilting, yellowing or browning foliage, premature leaf drop, branch dieback or slowed growth.
Transplanted trees may also experience root damage and dehydration, especially if they weren’t properly transplanted. Damaged roots cannot effectively take in nutrients, which inhibits establishment and growth.
Next, if the tree is incompatible with its new soil, root growth and water intake may be inhibited. Heat stress in Texas’ warm climate can also cause damage to transplanted trees, especially if you move the tree too late into the spring season, when temperatures are rising.
It can take anywhere from a few months to several years for trees to recover from transplant shock and damage. Signs that your tree may not survive include:
- Progressive branch dieback
- Leaves failing to reappear after dormancy
- Persistent wilting despite proper watering
- Extensive bark damage or cracking
- No visible new growth over multiple growing seasons
Transplanting trees is risky, which is why it’s helpful to work with a landscaping professional to ensure long-term health and success.
DIY Versus Professional Tree Transplanting: What Homeowners Should Know
Homeowners should only attempt DIY tree transplanting on smaller, young trees that are under eight feet tall. Larger tree transplanting should be handled by the professionals.
Homeowners are more likely to make common transplanting mistakes, while professionals have the experience and equipment needed for a successful transplant. Additionally, professionals are more well-versed in Texas soil and conditions, such as the best time to prune trees.

Aftercare: How to Help a Transplanted Tree Survive and Thrive
Maintaining a proper watering schedule for the first 90 days after a tree transplant is crucial. Follow these guidelines:
| Establishment Period | Watering Frequency |
|---|---|
| Weeks 1 to 2 | Water deeply every 1 to 2 days |
| Weeks 3 to 6 | Water deeply 2 to 3 times per week |
| Weeks 7 to 12 | Water once per week (twice per week during extreme heat) |
Follow these mulching best practices:
- Apply 2 to 4 inches of organic mulch, such as wood chips or shredded bark
- Keep mulch a few inches away from the trunk
- Extend mulch slightly wider than the planting hole
- Avoid applying mulch in a cone shape
Additional aftercare practices:
- Do not apply fertilizer after transplanting
- During the first few months, inspect your tree weekly for pests and diseases
When Tree Transplanting Is Not Recommended
Do not transplant diseased or dying trees, trees with structural instability or trees with extensive root damage. Additionally, you should not transplant trees with a low-transplant tolerance. Speak to a professional about other ways to save a dying tree.
Transplant Trees With Professional Help
Transplanting trees is a great way to redesign your landscape or preserve a mature tree. However, it comes with risks and challenges. For the best results, and to maintain long-term tree health and your home’s property value, it’s best to leave transplanting up to a professional.
If you’re considering transplanting a tree, schedule a professional evaluation today.