Many homeowners reach a point when they feel the urge to freshen up their interior living space. This might occur when you first purchase your home and want to update the colors of your walls before moving in, or it might not seem necessary until you’ve lived there for years and slowly arrived at the realization that you want a new look and feel for your home. Either way, making changes not just to the colors of your walls and ceiling but also their texture can be a great way to give your home a truly unique appeal. There are many types of textured walls to choose from in order to create the aesthetic you want, and each type is applied in a particular way, using certain tools and techniques.
The most popular options for wall textures include popcorn, orange peel, comb, slap brush, stomp brush, rose bud, sand swirl or crow’s feet.
Popcorn Texture
Popcorn is one of the most common types of texture found in homes—usually on ceilings, but occasionally on walls as well. Popcorn texture was popular in homes built in the 1960s through the 1980s, and it’s a good choice for uneven surfaces since its rough, variable appearance can hide many flaws. Its thick application also creates a sound-dampening effect, which can be desirable in homes where ringing echoes from tiled or hardwood floors are an issue. Many homeowners steer away from popcorn texture, however, considering it a bit old-fashioned.
Orange Peel Texture
Orange peel texturing is another common wall texture, so named for its shallowly dimpled effect that looks something like the outside of an orange. Orange peel texturing is smoother and subtler than popcorn texture, thus offering a more aesthetically-pleasing look for many homeowners wanting to make the switch.
Comb Texture
Comb texturing is somewhere between popcorn and orange peel texturing as far as how it feels to the touch, but it can be much more dramatic than either of those in appearance. This type of texturing is used to create repeating designs on walls such as fan shapes, rainbows, zigzags or wavy lines.
Slap Brush, Stomp Brush, Rose Bud, Sand Swirl or Crow’s Feet Texture
These patterns can look very unique, depending on the way you paint them into your drywall or the type of brush you use to “slap” the pattern on. You can achieve anything from a three-pointed crows feet look, to a look with striking marks moving outward from a center, to circular patterns.
If you want to attempt to create these textures yourself, what are the steps you should take?
How To Texture A Wall
Wondering how to texture a wall? Here are the basics, starting with the prep work that is required up front before any actual texturing begins.
Almost all wall texturing projects require some careful prep work to ensure that the texturing will be applied both evenly and correctly. First, you’ll need to remove any preexisting texturing from your walls, either by sanding it down—as with smoother types of wall texture, such as stucco-like finishes—or by wetting it and scraping it off—as with coarser textures like popcorn texturing. If you have popcorn ceilings or walls, this process can be quite laborious. Next, you’ll need to clean the wall, and then prime it if you plan to use texturing paint to create your desired effect.
If you’re using a technique that involves drywall mud, you’ll need to secure the tools and materials required for the job, such as a compressor and sprayer or special trowels, combs or brushes that will help you create the look you’re going for. The following types of wall texture involve drywall mud that is applied to the wall, textured with certain tools and then painted after it dries.
The following are different drywall method applications:
- Comb texturing is accomplished with a plastic comb tool with teeth of varying widths and spacings. This type of texturing can be difficult to do yourself because it requires precision and extreme attention to detail to make the pattern regular and even from one side of the wall to the other.
- Popcorn texture is created by spraying a popcorn mixture through a specialized sprayer. While this may sound simple, it can be quite difficult to create an even coating.
- Orange peel texture is created by thinning drywall mud with water and applying it to the wall with a compressor and sprayer.
- Sand swirl, slap brush, rosebud, crows feet or stomp brush textures are created by using a brush to make patterns in wet drywall mud. However, new tools are being released to create these looks without having to paint them by hand.
All of these techniques take practice and trial-and-error to perfect, so if you are considering a DIY wall texture project, be sure to practice first on a piece of scrap drywall to make sure you’ll be able to create the effect you want.
Painting textured walls can be a simpler, less complicated way to update the aesthetic appeal of your interior walls than techniques involving drywall mud.
Painting Textures
Some people paint on wall texture with paint containing sand or another additive, while others first apply a base coat in one color and then use a sponge, rag or stencil roller dipped in an accent color to dab or roll on texture. Most major paint lines offer textured paints that are relatively easy to apply with just a regular paint roller. If you’re using textured paint, make sure you have the room and materials set up and ready to go before you begin. Textured paint tends to dry fast, which means you’ll need to work quickly and complete the entire wall in one session in order to achieve an even look. Also, plan to apply a base coat and then a second coat as a finishing layer.
When making the decision to add texture to your walls, you also have to take into consideration the different types of painting materials you will need, as painting a textured wall can require more skills and different products than a smooth wall.
How To Paint Textured Walls: Tips For The DIY Homeowner
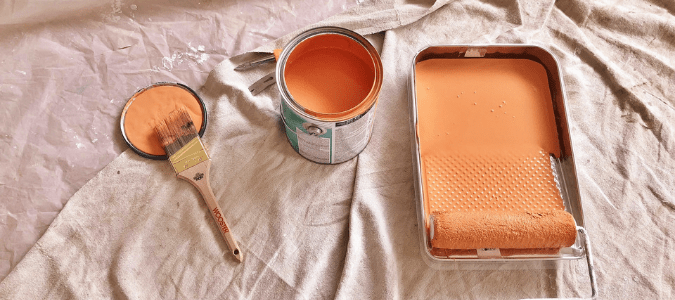
Your preparation should start by cleaning the walls of any dirt that may have collected over time. You can even take a vacuum to suck up any dust that may have collected on your walls. Then wipe down your walls to get rid of any caked-on dirt. This step is especially important when painting a textured wall, as it’s much easier for dust to settle in all of its grooves. Then, do what you would do with any other paint job—remove outlet covers, apply painting tape to crown molding, move your furniture to the center of your room and cover anything you want to protect from the errant paint drip.
Before starting, you’ll need to make sure to use the right type of paint roller or brush to ensure that the paint is applied evenly. If you use a roller that isn’t fluffy enough, for example, the paint is likely to miss the dips and valleys in the wall’s textured spots, creating a dappled effect. Using a paint sprayer can help ensure even coverage, but this technique requires you to drape or tape off everything in the room very carefully in order to avoid getting tiny droplets of color on surfaces you didn’t intend to paint.
Even if you aren’t painting textured walls, there are still some ways to make the process easier and make your finished project look nicer.
Additional Interior Painting Tips And Tricks
Here are a few interior painting tips and tricks for the homeowner who wants to try their hand at refreshing the look of the walls in their home:
Use A Tinted Primer
Buying a tinted primer will do a better job of covering the existing wall color as opposed to a white primer.
Avoid Lap Marks
Paint a section of the wall from the ceiling to the ground. Then, when moving to the next section, slightly overlap the section you just painted.
Keep Colors Consistent
If you’re painting multiple rooms the same color and have to buy multiple cans of paint, mix them in one big bucket. Despite being the “same color”, there can be inconsistencies from can to can.
Use Canvas Drop Cloths
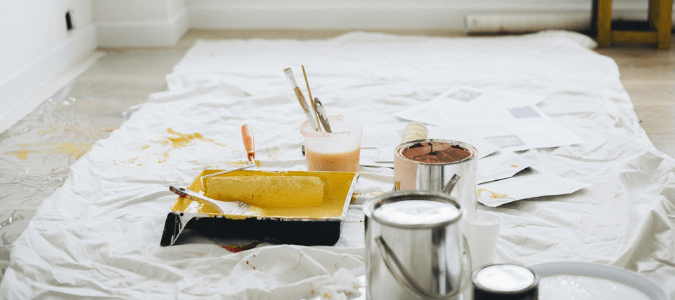
Many homeowners just grab old bedsheets to protect their furniture and flooring from paint splatters. But have you ever spilled something on a bedsheet? If you have, you know that whatever you spill tends to bleed through your sheets. Stick to canvas drop cloths to protect your things.
Reduce Your Indoor Humidity
Is your AC compressor not working, or are you having another problem with your system? Then hold off on your project. Humidity makes your paint dry slower which can extend the amount of time your project requires.
Painting your own walls and applying texture can be a time-consuming and complicated process. This is especially true if your walls have lots of trim detailing, high ceilings, previously applied texture that must first be removed or any other special circumstances. But if you’re bold or already have some experience with interior wall painting, feel free to try one of these techniques on your own—and remember that a professional is just a quick phone call away if you decide you need some help.
With all that in mind, let’s think more about a question on many homeowners’ minds.
Should I Paint My House Myself Or Hire A Professional?
There is no right or wrong answer to this question.
Some homeowners base their decision on how many walls or rooms they want to be painted and textured and how complicated the process might be. For example, if it’s an easy home improvement project and a homeowner has only an accent wall that needs painting, or just one room with walls that won’t need much in the way of priming, taping off trim, high ceilings or other special requirements, it’s easy to understand the decision to do research go the DIY route.
Other homeowners, on the other hand, might choose to hire a professional who already has the skills, tools and experience needed to get the job done quickly and well. If you want textured paint in a room that has lots of trim detailing, for example, or previously painted walls that will need to be primed before new paint is applied, hiring a professional might be the right choice for you. Rooms with high ceilings that will require spending time on a tall ladder to reach the upper portion of the walls is another situation that prompts many homeowners to outsource the job. Yet another good reason to hire out rather than tackling such a large job on your own is having multiple rooms in need of fresh paint and texturing or having small children or pets that could interrupt or disrupt the process.
It’s always wise to consider the hidden costs in DIY projects, including time and special equipment. If it’s going to take a lot of time and effort for you to paint and texture your walls in a way that looks finished and professional, it might be worth simply hiring a skilled professional who will likely be able to do an even cleaner job in less time. If you’ll need to rent or purchase special equipment in order to get the job done, it might actually be more affordable to hire someone who will come equipped with the ladders, rollers, sprayers and other specialized equipment needed to get the job done.
ABC Can Handle All Your Painting Needs
The professionals at ABC Home & Commercial Services are just a phone call away if you decide your interior wall painting or texturing project is too large or complicated to handle on your own. Our skilled professional painters are experienced in all types of handyman, home renovation and repair projects, including painting textured walls as well as painting trimwork, shelves, cabinets and more. We can often give free estimates over the phone for smaller jobs, or we can visit you on site to learn the scope of your needs and give you a detailed estimate for updating your living space with and updated or new look.
